Pancit Bihon
January 16, 2013
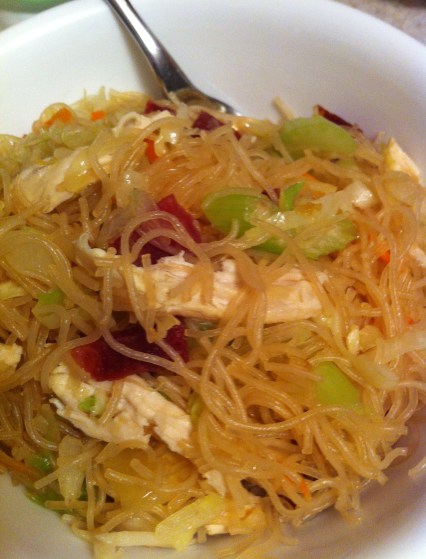
I used to work in a small private high school and every May I would look forward to Staff Appreciation Week. For one whole week, parents provided a lunch buffet for all the teachers and staff. The dish that I looked forward to each year was Pancit Bihon. It is a Filipino dish made with rice noodles, chicken, some kind of sausage and veggies. It’s savory, yet light and on Asian food day, I filled my plate knowing that I would not get it again for another year. You can imagine my sadness when after four years, the student, now a senior was about to graduate. I begged her mother for the recipe and she gave it to me! (She is one of those amazing cooks who never gives away her secrets). She even gave me a package of rice noodles and the Chinese sausage. She’s such a sweet lady.
So I made it a few times…until I ran out of sausage. But just last week I discovered an Asian food market near my house. Sure enough, they had the Chinese style sausage and rice noodles.
INGREDIENTS:
1 boneless skinless chicken breast
1 32oz carton chicken broth
12oz. rice noodles
2 tbsp. soy sauce
2 tbsp. olive oil
1 small onion, chopped
2 cloves garlic, minced
4 stalks celery, sliced on diagonal
1/2 head cabbage
2 carrots, sliced
Pancit Bihon is so simple to make. Start off by poaching the chicken breast in chicken broth for about 12-15 minutes in a medium sauce pan. Then remove the chicken, remove the pan from the heat, add soy sauce and soak the rice noodles for about 10-15 minutes. Meanwhile cut the sausage lengthwise and remove the casing. Then slice into long strips and cut down to 1/2 inch pieces. Microwave sausage for 45 seconds. Use a fork to shred the chicken breast.
In a large and deep skillet saute garlic and onion in oil over med heat for several minutes or until onion is translucent. Add cabbage, carrots & celery and saute until just tender (To be completely honest, I cheated and used bagged cole slaw mix that had cabbage and carrots and was on sale for a dollar). Be sure not to let the veggies overcook – you want them to hold onto a little bit of crunch.
Add the shredded chicken and sausage to the vegetables. After the noodles have softened, add them to the skillet and toss together. That’s it! You’re done!
This can be served as a main course or a side dish. It’s great for a pot luck too.
TWD: Nectarine Upside-Down Chiffon Cake
September 4, 2012
This week’s Tuesdays With Dorie assignment was Nectarine Upside-Down Chiffon Cake
For full recipe visit this week’s hosts: The Double Trouble Kitchen and The Little French Bakery
Because I’ve had a bit more extra time on my hands this week, I was actually able watch the PBS “Baking with Julia” video clip of Julia Child making this cake with Mary Bergin. From this video I learned the proper way to “fold.” I never knew you had to keep folding in the same direction.
Also, I am amazed at how far cooking programs have come! I am known to fall asleep watching the Food Network. My husband teases me because for the amount of Food TV I watch, I hardly ever make anything new. But to compare this PBS Julia Child episode filmed in what seems to be the 1980’s compared to any cooking program today is eye opening. These were just two regular women in a kitchen. No stylish clothes, fancy knives or high end appliances. Mary Bergin whipped the egg whites using a hand mixer rather than a stand mixer. When the cake came out of the oven, it wasn’t well lit, there were no close up hi-def shots to make my mouth water – it just looked like a cake – a cake that I could have made!
Today’s cooking shows are glamorous, every utensil and the high-end appliance they use make us green with envy. So all that to say, I found the simplicity of Julia Child’s program charming and a healthy reminder that I don’t need all the expensive “tools” to make a great meal.
Onto the cake. There were multiple steps to baking this cake. First was melting the butter and slicing up the nectarines and positioning them in the springform. Then, toasting the almonds, letting them cool, putting the streusel mixture together, letting it bake, and finally making the cake batter.
What makes this cake so light and fluffy is the two-part process of making the batter. The eggs are separated and the whites are whipped along with the sugar until they are stiff, like a meringue. In another bowl are the yolks, oil, lemon juice, and dry ingredients. The yolk mixture is then folded into the whites.
The batter is layered over the butter, brown sugar & nectarines with a layer of streusel in the middle.
The recipe calls for a 10-inch springform pan, but I used my 9 inch. I thought for sure I would have some batter left over, but it fit perfectly, which made me wonder if I did something wrong. As the cake cooled after baking I noticed that the middle started to sink a bit
But it still looked beautiful when I flipped it. Eat your heart out Food Network.
It was so good! Worth the effort. For me, the syrupy nectarines on top made the cake. Maybe I just picked really sweet nectarines? The streusel layer was also nice, adding a bit of nutty flavor. This was a perfect end-of-summer dessert and got a lot of oohs and ahhhs at the family dinner I brought it to last night. By the end of the evening, the cake was gone and the tray of Italian pastries were still there. That was the best compliment I could have received.
Everything I never had time to do before and Cake Batter Ice Cream
September 2, 2012
I have recently become unemployed. At 32 weeks pregnant, I’ll call it an early maternity leave of sorts. Whatever the circumstance, I now find myself alone in my home for 40 hours per week with all this free time that I never experienced before. In the past my “free time” was usually spent on the couch watching mindless TV while decompressing from a crazy day at work. It was all I could do to motivate myself to make dinner, let alone clean up afterwards.
So here I am adjusting to my new found free time – for the next 8 weeks anyway. The baby is due November 1st. So I am going to take advantage of this mini vacation before my new 24/7 job as Mom starts.
I now have time to do the things I’ve been meaning to do, finish the sewing/crafting projects I started, try out all those recipes I pinned, get my Etsy shop off the ground, not to mention get this house baby-ready.
A long time ago my sister and I (who are ice cream addicts but often too lazy to go out and get it) thought of an ice cream delivery service. Then we thought of a food truck that serves ice cream sandwiches where you can mix and match gourmet cookies with homemade ice cream and the topping of your choice.
The problem is we often have great ideas and never follow through and I’m only a so-so baker who had never made ice cream in my life. So, last Christmas (2011) I purchased the ice cream maker attachment for my Kitchen Aid mixer and have used a whopping 2 times since I bought it (now you have an idea of my level of motivation).
Until, I saw a recipe posted by Kate of Grinandbakeit for Cake Batter Ice Cream.
I had trouble with my last ice cream attempt using Nutella, but this recipe seemed so easy – and it was!
Recipe:
3/4 cup white cake mix
1/2 cup sugar
1 1/2 cups whole milk
1 cup cream
2 egg yolks
1/2 tsp. vanilla
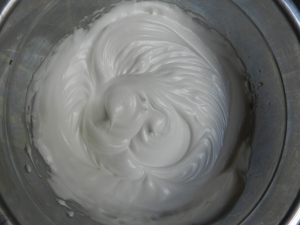
Combine the cake mix and sugar in a bowl and mix together. Add all other ingredients and whisk until cake batter is dissolved. Cover and refrigerate for 4 hours. Then pour the chilled mixture into your ice cream maker and run the ice cream maker according to manufacturer specifications.
Using the Kitchen Aid attachment, I let it run approx. 25 minutes on “stir.” It was just about reaching the top of the bowl when I stopped. I tried it of course and could not believe my taste buds how amazing it had turned out. I was in disbelief! I did it! I made ice cream! and it actually tasted good!
The hard part was knowing I had to pour the softer-than-soft-serve consistency ice cream into a container to allow it to firm up in the freezer overnight. I don’t like waiting.
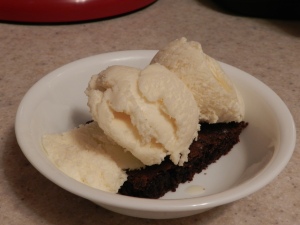
Fast forward to the next evening. I baked brownies (from a box – don’t judge) because brownies and cake batter ice cream are my favorite combination. It was heaven. The ice cream was creamy and cake battery. Although my taste-testers said they got more of a vanilla aftertaste would like more cake batter and less vanilla, so I may play with the recipe next time around. I probably need a better quality vanilla extract.
Did you notice how quickly I abandoned the ice cream sandwich idea in favor of brownies? Now you see why my genius business ideas never become reality?? I still have a few scoops left which I hope to pair with sugar cookies just like the inspiration picture.
The recipe made about 5 cups of ice cream.
Now that I have regained my confidence in the realm of ice cream, I sense danger ahead.
** In hindsight, I should have left out the raw eggs because of my pregnant situation. However, after I realized what I had just done, I scoured the internet Googling “raw eggs and pregnancy” certain that I would begin to present with the symptoms of Salmonella poisoning at any minute. Thankfully, I did not and was able to enjoy my ice cream success once again. In the future I will use more caution.
TWD: Popovers
August 21, 2012
This week’s assignment was Popovers!
Another first for me. Very simple batter – flour, milk, salt, eggs that’s about it. I just dumped everything into the food processor and poured into a muffin tin.
I’m not quite sure if mine came out a little darker that everyone else’s. Just looking at them, I thought I burned them for sure and that they would be hard as rocks. I was pleasantly surprised to find that they were flaky and still doughy on the inside! Flavorful too.
We’ve had a break in the summer heat, so I decided to make a roast for dinner. Can’t wait to sop up the gravy and potatoes with these.
Surprisingly simple. I always thought popovers were really fancy. Now I don’t know why you don’t see them on more dinner tables?
TWD: Blueberry Nectarine Pie
August 1, 2012
I can’t believe I am late posting this recipe!! And I made it a week in advance just so I would be ready on time! I’ll blame it on Olympic Fever.
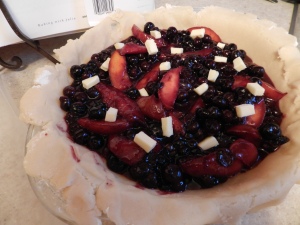
This was my second ever attempt at making a homemade pie and my first attempt at making pie crust. I was pleasantly surprised that it was not as difficult or time consuming as I had thought it would be. I think there is more pie making in my future, at least as long as there is beautiful fresh fruit in season to bake with.
I was intimidated with the pie crust. I used the food processor, but think I may have over-mixed the dough. I ended up adding a bit more flour in the end. It rolled out beautifully, but transferring it to the pie dish was a little tricky, I had to piece it back together.
The finished product:
It was so good. The first day, I ate the pie on it’s own to enjoy the simplicity of a pie. I may add more nectarines next time. The second…and third day, I paired a slice with some chocolate ice cream (my favorite dessert combination). Since my husband was not helping me eat the pie, I had to get rid of it by day 4 because I was beginning to feel like a glutton. But I already want to make another, this time for a crowd so there will not be any leftovers to tempt me.
TWD: Hazelnut Biscotti
July 3, 2012
I love biscotti and I like hazelnuts. What’s not to like about Hazelnut Biscotti?
Biscotti is another simple treat that I think I will start whipping up myself rather than buying that tub at Costco. I’m actually looking forward to trying out the different types of biscotti listed in the Baking With Julia cookbook. I prepared and baked these biscotti within an hour! Simple, simple, simple.
Does anyone remember Zwiebeck Toast? I remember eating it as a little kid eating way beyond my teething days (not that I remember my teething days at all) But I do remember loving that crunchy texture, but also loving when it got a little mushy. I think that’s why I like biscotti, it’s like Zwiebeck Toast for grownups. Now that I’m thinking about it, I think my aunt would use Zwiebeck Toast crumbs instead of graham cracker crumbs in her cheesecake crust. I should try that next time…do they even sell it anymore??
Check out this weeks hosts Homemade and Wholesome and Baking and Boys for the complete recipe.
Well, I cheated and used prepackaged chopped hazelnuts which I just toasted in the oven rather than doing the whole blanch in baking soda thing. I also added 1/3 c. cocoa powder and substituted hazelnut coffee I had on hand for the hazelnut liqueur.
My logs were short and stumpy, next time I might make them wider so the biscotti are longer (for dunking in coffee).
I was so pleased and will definitely make these again!
TWD: French Strawberry Cake
June 19, 2012
I confess. I usually purchase those pre-packaged shortcakes they sell right next to the strawberries at the supermarket. I am also known to cheat and use Cool Whip to create my “strawberry shortcakes” which I write in quotes, because after this recipe I realize my supermarket version was a far cry from the actual thing.
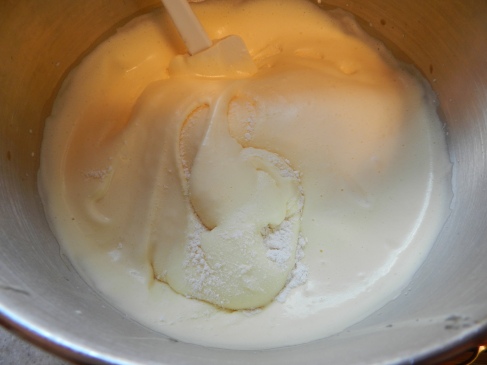
This French Strawberry Cake had a few extra steps, but wasn’t too complicated. Thank God for Dorie’s helpful tips or I surely would have messed this one up. After beating the eggs and sugar together (for nearly 6 minutes), had she not advised “if the ribbon immediately sinks into the mixture, continue whipping for a few more minutes” my Genoise would probably be a little less sponge-y.
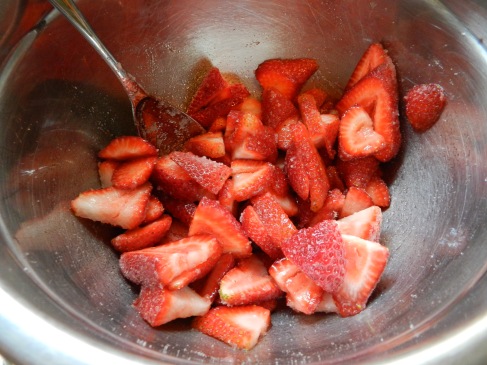
I love recipes with fruit! Luckily I found some beautiful strawberries to use with this cake. The recipe requires a bit of time for the fruit to meld with the sugar – I’m sure there’s a baking term for this. My husband was caught several times sneaking strawberries out of the bowl I left on the counter. When I yelled at him he claimed he couldn’t resist because never had strawberries that were so delicious and juicy! I had to break the news that it was because they were covered in 1/2 cup of sugar.
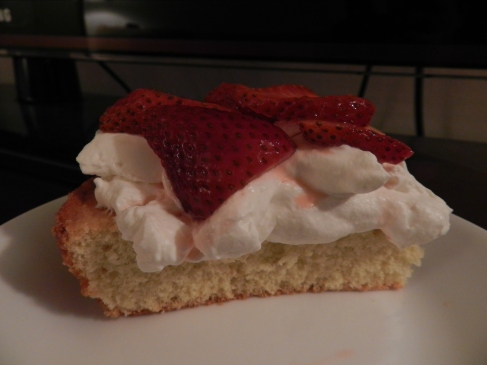
This cake is going to come with me to work tomorrow, so I didn’t want to assemble it beforehand. It might get soggy or fall apart before I get there. Instead, I’ll probably let everyone construct their own slice. It will be a welcomed break from grading final exams.
For more details on this recipe, check out this month’s Tuesdays With Dorie Hosts: Sophia and Allison.
Lemon Loaf Cake
April 17, 2012
Lemon desserts are my favorite and this Lemon Loaf Cake was extremely easy to put together. I’m noticing that I only select the “easy” recipes each month with the Tuesdays With Dorie group. Maybe next month I’ll rise to the challenge and bake both selections.
Check out this month’s hosts Treats and The Beauty of Life for the recipe.
I was a good girl and actually used room temperature ingredients (eggs & melted butter) I had ignored the room temperature requirements in another recipe a few weeks ago and it was a disaster. I actually enjoyed whisking all the ingredients together by hand in one bowl rather than using the stand mixer. Less bowls to clean too!
So, so easy. But is it delicious?? I couldn’t tell you. I was in such a rush to get this recipe baked and done and I decided I’ll test the theory about letting pound cake rest overnight and bring the loaf into work tomorrow. We’ll see. My whole house sounds great though!
TWD: Irish Soda Bread
March 20, 2012
I happen to love Irish Soda Bread. I look forward to St. Patrick’s Day each year because that’s when the bakeries in the area start to sell it. The window of opportunity is very short, they only seem to sell it for a week. If you miss the window, you have to wait a whole year before it appears again.
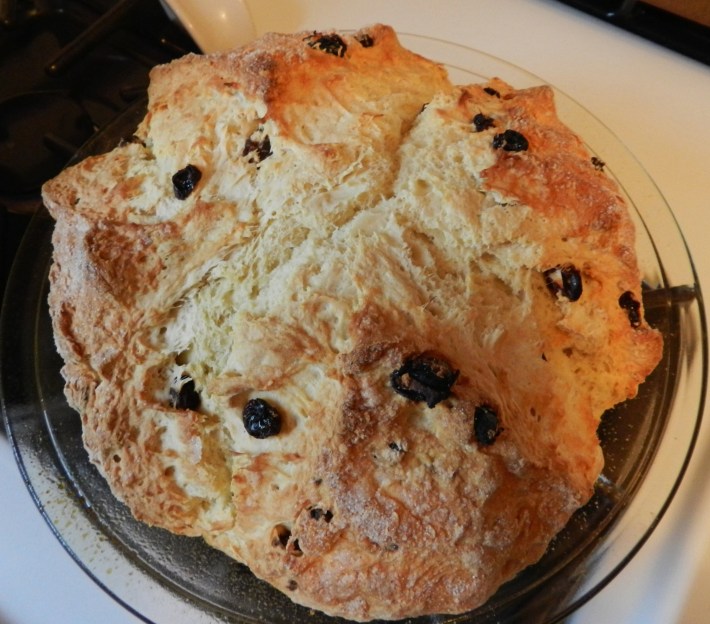
You can imagine my joy and surprise to realize how EASY this Irish Soda Bread recipe was to make. I can have it all year round now!
4 ingredients and 15 minutes prep. Can’t beat it!
I added a cup of raisins to my batch and topped off the dough with a good handful of sugar before baking. It adds a sweet crunch to the crust – it’s the way I’ve always had it. I have a bit of a sweet tooth. Sometimes after slathering a slice with butter I sprinkle a bit more sugar on top (so bad, but sooo good).
My loaf stretched a few days wrapped in tin foil. Can’t wait to make it again. Thinking about having a St. Patty’s dinner do-over in a few weeks. Now that I know I don’t have to wait a whole year!
TWD Chocolate Truffle Tartlets
February 21, 2012
I admit that I chickened out on the first Tuesdays With Dorie assignment. The thought of baking bread from scratch was just to intimidating for me. So I figured I’d start with the Chocolate Truffle Tartlets instead. Because I do not have mini tart pans, my tart was full-sized.
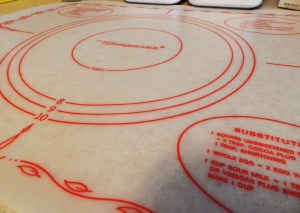
As I have mentioned before, I just keep finding little goodies in the crevices and corners of my basement. My house has been in the family for over 50 years and so you never know what you will find. During my last expedition I came across a vintage Tupperware pastry mat. After a little scrubbing it was good as new!
Anyway, the tart dough came together quite easily in the food processor and I was able to use my “new” mat to roll it out to the right size for my pan. The filling was also simple enough, but I think it was not enough to fill my full-size tart pan. The finished product was a bit patchy and not very pretty, but it tasted good! I loved white & milk chocolate and biscotti that was mixed in.
Poor little ugly duckling.


